Your preferred unit.
Turn to select °C or °F. The temperature symbol flashes at 4 Hz; the digits keep showing a temperature. Press to save and return to the main menu. Hold 2 seconds or wait 10 seconds to save and exit to heating.
An 80 W digital soldering station for electronics repair and DIY. This US version uses 120 V AC / 60 Hz power and a 90–480°C adjustable range.
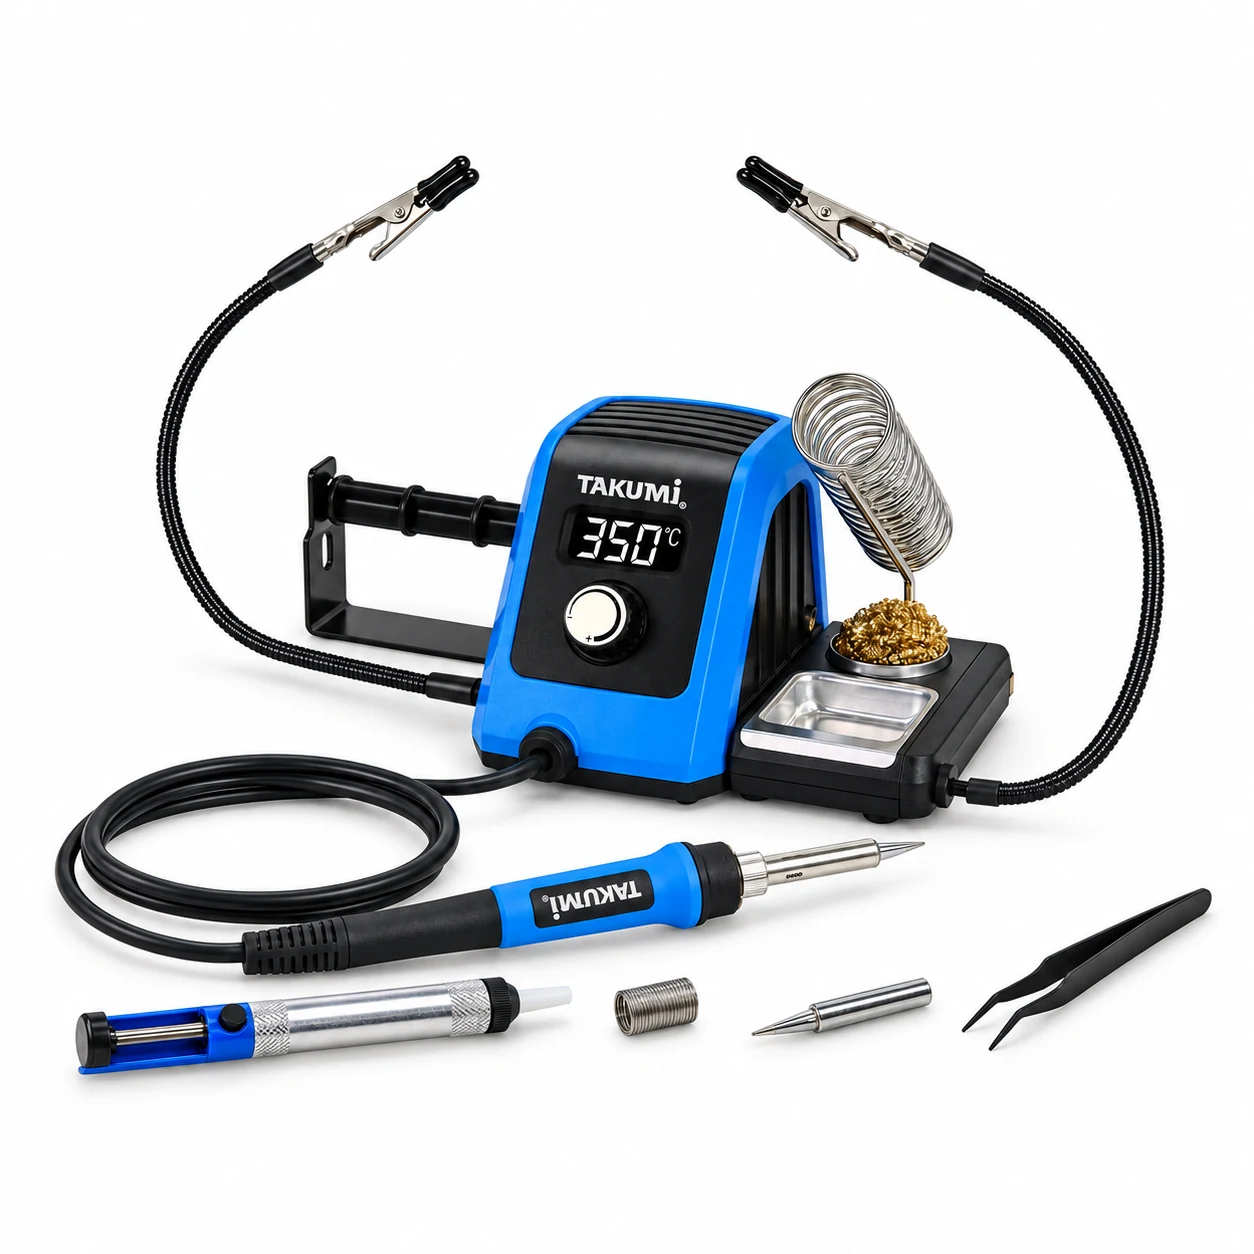
Read the LED display. Adjust with the rotary dial. Keep your focus on the joint.
A blue housing. A black faceplate. A white LED readout and a silver push encoder. Explore the station’s controls on your phone or computer.
A number you can see.Real-time tip temperature during heating and cooling.
A setting you can change.Slow turn: 1°C. Fast turn: 10°C.
A setup you can refine.C_F · CAL · Stb · AS settings menu.
Simulated temperature transition · not actual heating speed
5 min → 200°C standby · +10 min → SLP. Lift iron to wake.
Measured tip temperatures from three supplied 120V test reports. Select a setpoint and explore the first 120 seconds.
Approximate range across the three reports.
Actual tip temperature, not the setpoint.
| Elapsed time | Approx. tip temperature | Reference |
|---|
Reference only. Time follows the test log from 00:00:00; the exact offset from pressing the power switch is not documented. Initial recorded tip temperatures were approximately 24–27°C. Heating varies with calibration, tip, supply and conditions. Reaching a temperature once does not establish stable operation.
Three supplied reports are identified by 47.4Ω, 51.1Ω and 54.7Ω. These are report groups, not three selectable temperature levels or a guaranteed production tolerance. Curves use the recorded samples at 1-second intervals, with straight lines between them for display.
350°C condition: column D, “calibration at 350 / setpoint 350°C”. 450°C condition: column H, “calibration at 350 / setpoint 450°C”. The same calibration point is retained when changing the setpoint. Source time: A3:A123; tip readings: D3:D123 or H3:H123. Sheet names: Sheet1 for 47.4Ω; DATA for 51.1Ω and 54.7Ω.
Uncalibrated column B is not pooled with calibrated data. The multi-setting sequence in column F is excluded because setpoint-change times are not explicitly labelled. Ambient conditions, tip details and instrument uncertainty are not fully documented.
The manual lists about 40 seconds to 350°C. In these reports, at a 350°C setpoint the tips measured 289.7–302.0°C at 40 seconds, and 336.15–345.1°C at 60 seconds. At a 450°C setpoint, the first recorded values at or above 350°C occur at 41–42 seconds. These are different test conditions and must not be presented as the same claim.
Sources: 120V KNS温度测试47.4Ω汇总.xlsx; 120V KNS温度测试51.1Ω汇总.xlsx; 120V KNS温度测试54.7Ω汇总.xlsx. Observed ranges are descriptive, not confidence intervals or guaranteed specifications.
Get closer to the parts that make up your workspace. Select a feature to explore.
DETAIL VIEW / FLEXMOUNTBy default, 5 idle minutes triggers Standby at 200°C. After another 10 minutes, heating stops and the screen displays SLP. Lift the iron to resume, or press the knob when controls are unlocked.
The timeline follows your Stb menu setting (0–15 min). Setting 0 disables Standby. This is an accelerated demonstration, not a live timer.
Temperature control is active.
Choose a setting below to try it in the simulator above.
Turn to select °C or °F. The temperature symbol flashes at 4 Hz; the digits keep showing a temperature. Press to save and return to the main menu. Hold 2 seconds or wait 10 seconds to save and exit to heating.
Use an external tip thermometer on the real station. Match the display to its measured temperature. The temperature symbol flashes while editing. Confirm to check the ±57°C limit; E03 appears only if the pending calibration cannot be saved. Pressing save returns to the main menu.
Adjust Standby from 0 to 15 minutes. Zero disables Standby. The default is 5 minutes, with a 200°C standby temperature. Press to save and return to the main menu, then try Stb and SLP directly in the control panel.
Enter AS, then press at 000 to confirm. Restores 350°C, calibration 0°C and Standby 5 min. Holding 2 seconds or waiting 10 seconds cancels and returns to heating without a reset.
Select a code to see an illustrative display.
Hold the encoder for 5 seconds to lock or unlock both temperature control and menu access. A blocked press or turn flashes the screen twice; continuous turning keeps it flashing until rotation stops. In any menu or submenu, a 2-second hold saves and returns to heating (AS cancels reset); keeping the same press held to 5 seconds total locks the controls. Pressing to save C_F, CAL or Stb instead returns to the main menu. Ten seconds without input saves and exits; AS cancels without resetting.
On power-up, the station heats to the previous temperature setting; first-use default is 350°C. The rear switch controls power. After use, switch off, disconnect the plug and allow the iron to cool in its stand. Never leave the powered station unattended.
The manual permits a sponge or optional tip tinner in the front tray. This does not mean either item is included in the kit; the previously confirmed kit has an empty metal tray and no sponge.
Explore the station and its supporting tools.
Tap the image for a closer look.
From a first circuit to your next repair, create a workspace that keeps the tools you need within reach.
Get into the details ↓The front metal tray is supplied empty. No sponge is included.KNS-P2225 FlexMount
Digital Soldering Station